Beginner's Guide to Eleventy [Part II]
Welcome to Part II 📌
You are reading Part II of a IV part series.
Part I: What is a static site generator? > Part II: Installation 👈🏽 You are here
Part III: Structure/Basic Customisation (coming soon)
Part IV: Advanced Customisation (coming soon)
If you are confused or in need of context, please go read Part I—it is where I establish all the context of what static site generators are.
As much as possible, I'm going to treat this part of the tutorial like a cookbook, except I won't make you read seven paragraphs about that one summer I spent in Emilia Romagna rolling the perfect tortellini as I had a torrid tryst with Paolo (sorry, reading too many romance novels).
I will, however, tell you all of the "ingredients" you need, dirty my hands with the scary parts, take it step by step, and ensure that I provide ample resources to prevent you from hitting dead ends.
Let's collectively admit something: We are not great at giving robust and clear installation instructions. More often than not, our package installation instructions look something like this:
Installation:
npm i luigis-castle
You're set!
I'm sorry, what? Where do I... put that? Then, what? Even if I know where to put that, I now have this cyborg telling me that I'm missing several trillion dependencies? I'm sorry, are you telling me to go to therapy? I already do, and therapy is awesome, sucker.
I want to prevent that.
So, you might find that this guide is --verbose. It is intentionally so because most of the time we're overly concise and people give up at the very beginning. I've partitioned explanations into notes where I can, so you can choose to skip over them if you already know everything. Cool? Oh, you want a cookie. Here. 🍪
Let's get started.
Tools Required for Eleventy 📌
A developer's tools can be personal. To some degree, if you choose well for you, a tool can really help speed up rote tasks, give you fewer headaches (by providing more colour customisation and modes), and create a more pleasant developer experience (DX).
Some developers have strange infatuations with tools and will insist some are better than others—10x developers might even make fun of you if you use the wrong tools. I think it's more personal than that. Picking out dev tools is like picking out a sports bra. Try out a bunch. See what sucks the least for you that you can get in and out of without breaking your arms. Learn how to customise them so you're less likely to have a uniboob. Abandon them in the back of a drawer if they don't work.
1a. Terminal Emulator 📌
Terminal emulators (or Terminal or Term, if you're friends) are the bare bones text tools that make you look most like a hacker. If you've ever opened up Windows Terminal on Windows or Terminal.app on MacOS, you were in the terminal emulator. Terminal emulators are essentially stripped-down programs without much of a visual interface that can give you access to your own computer and connect you to other computers.
Inside of the terminal emulator, you are using the Command Line Interface (CLI). When people talk about running something in command line, this is what they’re usually referring to. By comparison, most programs that we use day to day, like Microsoft PowerPoint, Adobe Illustrator, Sketch, Microsoft Paint, are all considered Graphical User Interfaces (GUIs). In GUIs, you can see a visualisation of what you're doing. When working in a CLI, you are using text commands and relying on text output, which can be harder for many to visualise. We’ll talk more about this later, but as with all things, your preference for CLI versus GUI (when both exist) is up to you.
Terminal emulators can do a lot, but for the purposes of this tutorial, you'll mostly be using it to download and to run Eleventy, to manage your packages (heh), and to version control your code.
Examples: Hyper, iTerm2, Terminal (default for MacOS and Windows).
Cues: Many tutorials are not always explicit about when you're using the Terminal. Usually if you're cued to run, build, npm, npx, homebrew, yarn etc, and you see a short block of text like this, often preceded by a $ (which you should not copy):
$ npm i make-me-a-sandwich-mario
You're going to paste that in your Terminal and hit return/enter to run it.
1b. Shell Language 📌
When you run scripts and commands in your terminal emulator, you do in a shell or command language. The default language for Linux and older MacOS (pre-Mojave) is Bash and newer MacOS is zsh. The differences in the language usually result in the commands differing slightly.
I mention this here because this is a future potential "gotcha" where you can get slipped up because an installation guide for a package manager can presume you are using one or the other. While they are very similar, there are slight differences that can cause headaches. It's important to know which you're using and general differences.
If you have never interacted with your terminal's shell language, I recommend figuring out which is your default. To do so, open your terminal emulator, and run (paste in this code and hit enter/return) this command:
ps -p $$.
It should return (send you back) something like this below:
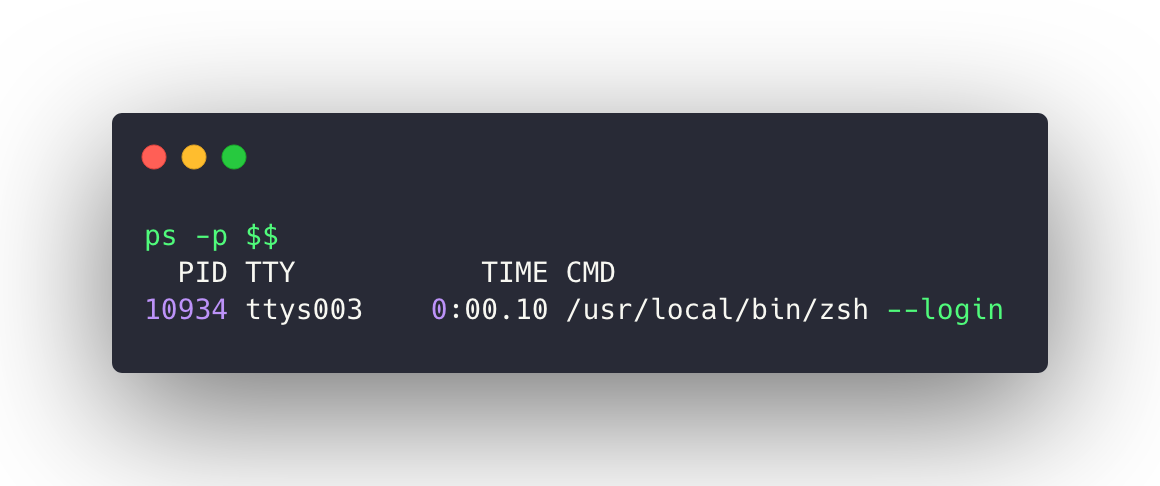
The command ps is telling the command line to show all the processes that are running. The -p flag tells it inform more about the process, and the $$ tells it to narrow this down to the current process.
If you see zsh, bash, tcsh, ksh (anything ending in sh), that's your shell language. (If that didn't work for you, try some of the other commands.)
1c. Installing Node.js and npm 📌
Node is a environment you need to install onto your computer in order to run Node Package Manager (npm). (You need npm to install Eleventy—the whole point of this post. Did you forget? I sorta did!).
To check if you already have node on your machine, run the following command in your terminal emulator:
node -v or node --version. (If one doesn't work, try the other).
You may have noticed that sometimes flags have one hyphen and other times they have two. One hyphen flags (
-v) are the short-name version of the command, and two-hyphen flags (--version) are the long-name version of the command. I find that when I'm starting out, I like to write out the long-name/two-hyphen version so I can talk myself through what I'm doing.
If it returns v followed by numbers, something like v12.13.1, that means you have Node installed. Eleventy requires any version of Node newer than 10 (at time of writing, please check Eleventy Docs to confirm), so if you've got that, you're set! Woohoo!
If you get anything other than that, that means that you either don't have it on your computer and will need to install it or need to update it.
Follow the instructions below for your operating system, and come back here once you do.
Once you have Node.js installed, you can now install npm.
1d. Installing npm 📌
npm is the main package manager for Node.js; they have a registry of all the packages and modules which is accessed by a command line interface. Think of it as the central library of code snippets that everyone can "borrow" at once. npm makes it so that you can search for specific features you need to add, like a React image carousel or a static site generator, like Eleventy!
Packages can rely on other packages, which is called a dependency. You will come across that word a lot. A dependency means that a package (let's call it House Package) uses another package (let's call it Room Package). Sometimes, when Room Package makes an update, it can break House Package. Sometimes the maker of Room Package decides to remove it from the registry or make a change that isn't compatible with House Package. That means House Package can break. Now imagine this incepted from House, into Street, Neighbourhood, into City, into State, into Country, into Continent! One small change can impact many pieces of software, and frankly, take an entire sector of software down. So, it's important to be mindful when you're engineering of all the dependencies you invite in, and to monitor them.
If you installed Node.js, then you should have npm installed. To check which version, in your terminal emulator, run:
npm -v or npm --version. (If one doesn't work, try the other).
At time of writing, the current version of npm was 6.14.5. If you have something older, update your npm by running the following command:
npm install npm@latest -g
2. Source-Code Editor 📌
A source-code editor (or just code editor if you're friends) is where you edit code or make the magic happen as I like to say. The code editor is also where you can look like a hacker.
Choosing a code editor can be really daunting, as everyone who has a four-letter name has a strong opinion about which is the best and is willing to go to great lengths to convince you.
If you're starting out with code, my recommendation would be to pick the one that stresses you out the least. Look at the screenshots and read reviews. Consider what customisations are for your needs, say, like if you rely on a screen reader. See what seems appealing to spend hours crying in front of. For many years, I wrote in Coda (RIP), Sublime Text, Atom, then now I'm in Microsoft Visual Studio Code (VSCode). However, I think if I started in VSCode, I would have been overwhelmed with all the bells and whistles.
Examples: GitHub's Atom, Adobe's Brackets, Notepad++, Sublime, Vim if you hate yourself and wear purist badges proud (jk! No tool shaming), Microsoft's Visual Studio Code (VSCode)
Cues: If you see longer blocks of code, you're going to likely edit that in your code editor.
You might hear someone refer to their Integrated Development Environment (IDE). People sometimes use IDE interchangeably with code editor, when they are not, in fact, interchangeable. By definition, IDEs comprise a code editor, build automation tool, and debugger. Sometimes they have GUIs integrated into them as well.
Most tools you hear about are code editors, including Microsoft's Visual Studio Code (VSCode or just Code if you're good friends), which, while robust and very full-featured with the help of extensions, is not an IDE. Microsoft's Visual Studio is their IDE, as it is a fully-integrated environment. Naming, am I right?
Also, because people tend to get their panties wound up in sailors' knots about this, you're not any "less" of a developer for using either a code editor or an IDE—use what you like and change it up if you change your mind. Neither is intrinsically better than the other; they're both valid for different developers in different contexts. Some IDEs and code editors have better support for certain languages, for instance. That's the sort of thing you should note for how you decide, not what some Chadwick tells you to decide. I've articulated the difference here for the pure purpose of education. And, as someone who writes and runs a dictionary, I think nuance is important. 🙂
For the purposes of what we're doing, I'd recommend that you get a code editor as it will suffice for this project.
3. Browser 📌
You probably already use a browser regularly. In fact, I would be willing to bet you're accessing this post from a browser. However, the browser that you use day to day to surf might be different than the one you choose to use when developing.
While we should all test our sites across multiple browsers, I think most of us will conduct the majority of our build within the browser we feel most comfortable with initially. To me, the choice of what main browser to use to do the majority of my development comes down to what the audience is most likely to use (this is one of many areas where user research is critical!). If no compelling user-driven decision exists here, like if it's for my personal site, where I don't collect user data, it typically comes down to the Developer Tools and Extensions I care most about.
Personally, I use Firefox equipped with DuckDuckGo as my search engine for most of my browsing (because security and privacy are very important to me for personal browsing), but I recognise that's a small user share. I sometimes use Firefox Nightly so I can take advantage of cutting-edge features. (Firefox Nightly is not stable, though, so it's only used for this purpose). I develop primarily in Firefox and Chrome. (I prefer Firefox's DevTools and Chrome performance tooling [Lighthouse]). Play around with the Developer Tools of multiple browsers. See which one's interface makes the most sense to you.
Examples: Desktop: Brave, Google Chrome, Microsoft Edge, Mozilla Firefox, Apple Safari, UCBrowser, etc. Mobile Google Chrome, Opera, Opera Mini, Apple Safari, Samsung Internet.
4. Git 📌
Git is an open-source, free distributed version control system. Git enables you to take snapshots of your code, so that if you break it, you can revert to when your code was functioning. It's like the Delorean for code. It also allows you to share your code for collaboration, for multiple people to work on the same code without saving over each other’s work. It also allows for you to share your work, for someone else to download a copy, and to play around with it.
When you think of Git, you might think of BitBucket, GitHub, or GitLab. Technically, all those products offer Git hosting as a service; providing storage to the code somewhere where many people can access—this is the underpinnings of what it means for the version controlling to be distributed. Git hosts also often provide a whole slew of other benefits, like helper tools (a desktop GUI or web interface that visualises what’s happening in the command line, for instance), allow you to create profiles, and find new projects and collaborators.
Git can be accessed from an emulator, a desktop GUI, a web app, and is integrated into some code editors/IDEs (and a combination of all four). Most developers primarily rely on accessing it through their terminal emulator, as GUIs can be limiting (and not all Git hosts offer them), but I highly recommend you try them all and see what works best for you.
Git is without a doubt one of the most intimidating parts of being a developer. For visual folks, it can be hard to understand what is going on under the hood. Git commands are sometimes obtuse. Working on massive code bases with large teams can exacerbate these fears.
Git is something that generally becomes more intuitive as you practice. Practice, practice, practice. I recommend using it on your own small projects. Allow yourself to make mistakes and learn how to get yourself out of them. OhShitGit is one of my favourite resources for when I get stuck and feel that git-sweat come on.
And, though practice helps, know that even the most seasoned developers royally fork (SORRY) up their repos sometimes. It's okay. It's this weird thing we all do so we can commiserate over it, like burpees or taking out the trash. Most things you do are reversible. If you're worried at first, there is no shame in copying your entire folder somewhere else just in case. There's a saying about something not being backed up unless it's backed up thrice anyway.
For the purposes of this project, you need to have git installed onto your machine and an account with a git host.
Installing git can become complicated and frustrating very quickly. If you encounter roadblocks, know that you're not alone. While I'd love to explain exactly how to install git, several key factors will change the exact instructions, including the operating system you use (MacOS, Windows, Ubuntu, etc), what command line interface you use, etc. Atlassian’s guide is a good place to start.
Examples of Git Hosts: Atlassian BitBucket, GitHub, GitLab, SourceForge.
Note that for most personal purposes, these services offer free accounts. Be mindful of what constitutes as a paid account and for what needs.
Installing The Things 📌
Once you have your terminal emulator, code editor, git installed, and an account with a git host, you're ready to install Eleventy! You've made it past a huge hurdle! Seriously, not being sarcastic. Environment set-up is one of the biggest hurdles, and you just did most of it!
The last step is installing Eleventy.
- In your terminal emulator, run
pwd(present working directory) (if that doesn’t work for you, trycd) to figure out where you are. Once you are where you think you need to be, runls(shortened form of “list”) to list out all the items in the folder you are in (ordirfor Windows). - Navigate to the folder you want (use
cdto go into a folder; usecd ..to back out of a folder). (Note that depending on your operating system, the back slashes (\) could be forward slashes instead (/). - Once you are in the folder you want to house your project, run
mkdir eleventy-project-name. (You can call youreleventy-project-namewhatever you want. It’s not permanent, and we can change it later.)mkdircreates a new directory with that name. - Navigate into that folder using
cd eleventy-project-name - Run
npm init -y. This command creates what's called apackage.jsonfile; they are like a recipe of all the ingredients (or packages) used from npm.package.jsonfiles can also keep track of other on-going tasks that your project needs. When someone clones your project, thepackage.jsonfile tells npm all of the packages that are necessary to make that project run. Theinitinitialises npm. The-yhere is saying "yes" to all the questions thatnpmasks, and sets them to defaults.
The command line should return a confirmation that starts with "Wrote to [directory]/package.json: ...more code".
- Run
npm install --save-dev @11ty/eleventy.
install goes to the npm registry and asks it to look for @11ty/eleventy. --save-dev tells npm to save this package (@11ty/eleventy) into what's called your devDependencies. All of this is happening locally, which means that this Eleventy install will only work for things inside of this directory.
Unpacking that further:
devDependencies are what are required to develop your package and are installed automatically when someone downloads your package. Dependencies are what is required to run the project, so for example, a user of a package needs its dependencies, but not necessarily its devDependencies. Your package.json is what keeps track of all these packages you use.
The --save-dev command is what tells the command line to store this into your devDependencies in your package.json file. The two dashes that precede the words save-dev make the command a flag. So, when someone says “add a save-dev flag,” this is likely what they mean. Flags are essentially arguments that add extra conditions to the initial command.
While you read all that, you may notice that npm is still running. You should see a sort of progress bar to let you know how much more it has to go. You may see a series of warnings about things that have been deprecated. For now, you can ignore all that. (Most developers continue to ignore all that.)
Whenever you see a
-gflag appended to an npm command, that means that it’s going to be installed globally. The upside is you’re only going to install it once, but you might run into issues down the line. Most folks work locally, as it prevents what are called “interoperability” issues. For example, you might encounter a project that is running on an older version of Eleventy than the global one you have installed, which will cause infuriating errors. Therefore, it’s best to treat each project independently. You might notice that most devs prefer to install things locally for this reason.
- To check that Eleventy installed properly, run
npx @11ty/eleventy.
npx is a helper tool for npm. If you were to run npm @11ty/eleventy, it would not work. The reason for this is a bit complex (Kat Marchán, who authored npx, explains npx in this Medium article.), The general reason is that npx will check your global folder to see if the package you want to install already exists. If it doesn’t, it will go ahead and download that package locally and run it for you, which saves a few steps and prevents you from future headaches. (Read more about why local installations are preferred above.)
The command line should confirm that Eleventy is installed by returning something like:
Wrote 0 files in 0.03 seconds (v.0.11.0).
Because you haven’t written any files yet, it makes sense that there are 0 files to write. The v… indicates what version of Eleventy you are running. At time of writing, it is v.0.11.0
- Now, we are going to create an index.html page so you can see Eleventy in action
Run echo 'You are officially a developer!' > index.html
Breaking this command down, echo says to the command line “read me back all this stuff.” Everything within the single quotes (‘) is what you’re asking the command line to read back.
The second part of the initial command, > index.html, includes what is called an append symbol (>). While you might know this as the greater than symbol, in this context, it tells the command line to instead place the stuff inside the single quotes into a file called index.html, instead of returning it (with echo), like the statement it did above.
The command line won’t confirm that it successfully created the file. It will just start a new line and await the next command.
-
To view your work, you will now run Eleventy again by typing
npx @11ty/eleventy. OR, you can push the up arrow on your keyboard until you see that line again and hit enter. -
Now we want Eleventy to show us the work we did in the browser by running
npx @11ty/eleventy --serve. You’ll see it run a few commands and end with “Access URLs.” Copy and paste the http://localhost:8080 into your browser. You should see your site that says “You are officially a developer!” because you are!
The --serve flag takes your files and opens them in your browser.
As we learned about in the last post, this step is where Eleventy takes all of the static files in all their different languages, and generates the site into languages that the browser can render. We'll talk more in the next instalment of the structure of Eleventy and how this all comes together. For now, know that this is the part where the Generator part of Static Site Generator comes from.
Feel boss! You have gotten your environment up, and have a fresh new website to play with! You are totally a developer who served up your first static site (Or maybe 30th! It’s still exciting!).
Thank You 📌
Thank you to Dia Trahman, Eddie Pearson, Jennifer Davis, Melissa Em, Sunil Pai for their attention to detail, in particular, for the beginner readers who bravely went through my imperfect instructions!
References 📌
Wikipedia: Usage share of web browsers
Questions and Corrections 📌
For questions, please reach out on Twitter! I can't promise to answer all your questions, but I'll try my best!
For corrections (typos, factual inaccuracies), please file a GitHub issue.